
How to horizontally autoscale pods in Kubernetes
In this article I demonstrate how to set up an autoscaler to scale up the pods when the CPU usage exceeds a certain threshold and back down again.
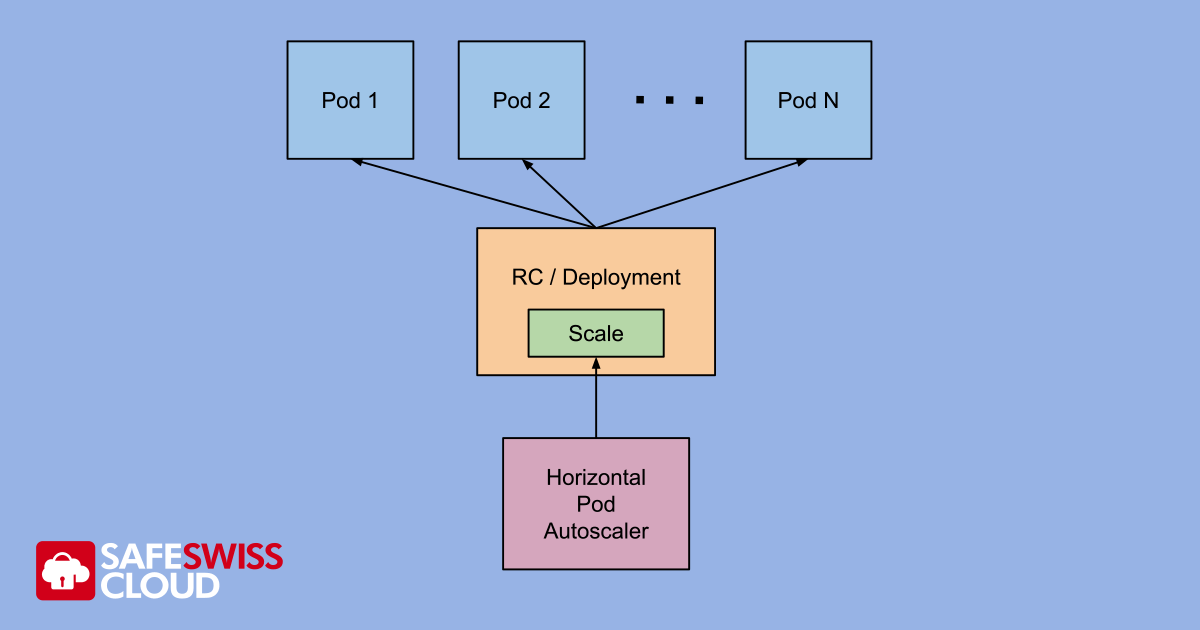
One of the many wonderful features of Kubernetes/OpenShift distribution as implemented at Safe Swiss Cloud is the HPA Horizontal Pod Autoscaler. As the name suggests, HPA will automatically spin up or spin down pods for you when a given CPU or memory load threshold is crossed.
Goal
To demonstrate by example how the HPA in OpenShift/Kubernetes can scale the number of application pods from 1 to 3 replicas as load increases and back down to 1 again as the load decreases.
Implementation
Here is an example of how to set up an autoscaler to scale up the pods when the CPU usage exceeds a certain threshold. I will demonstrate doing this using the graphical user interface of OpenShift 4.5. The same can be achieved using the CLI – this method is described in the official documentation https://docs.openshift.com/container-platform/4.5/nodes/pods/nodes-pods-autoscaling.html.
- Deploy a suitable Pod for our Test
First off we need to deploy some sort of pod that we can use to test our autoscaler. In this example I went for the OpenShift example https://github.com/sclorg/django-ex since this exposes a web server and external route, which is easy to load up with URL requests.
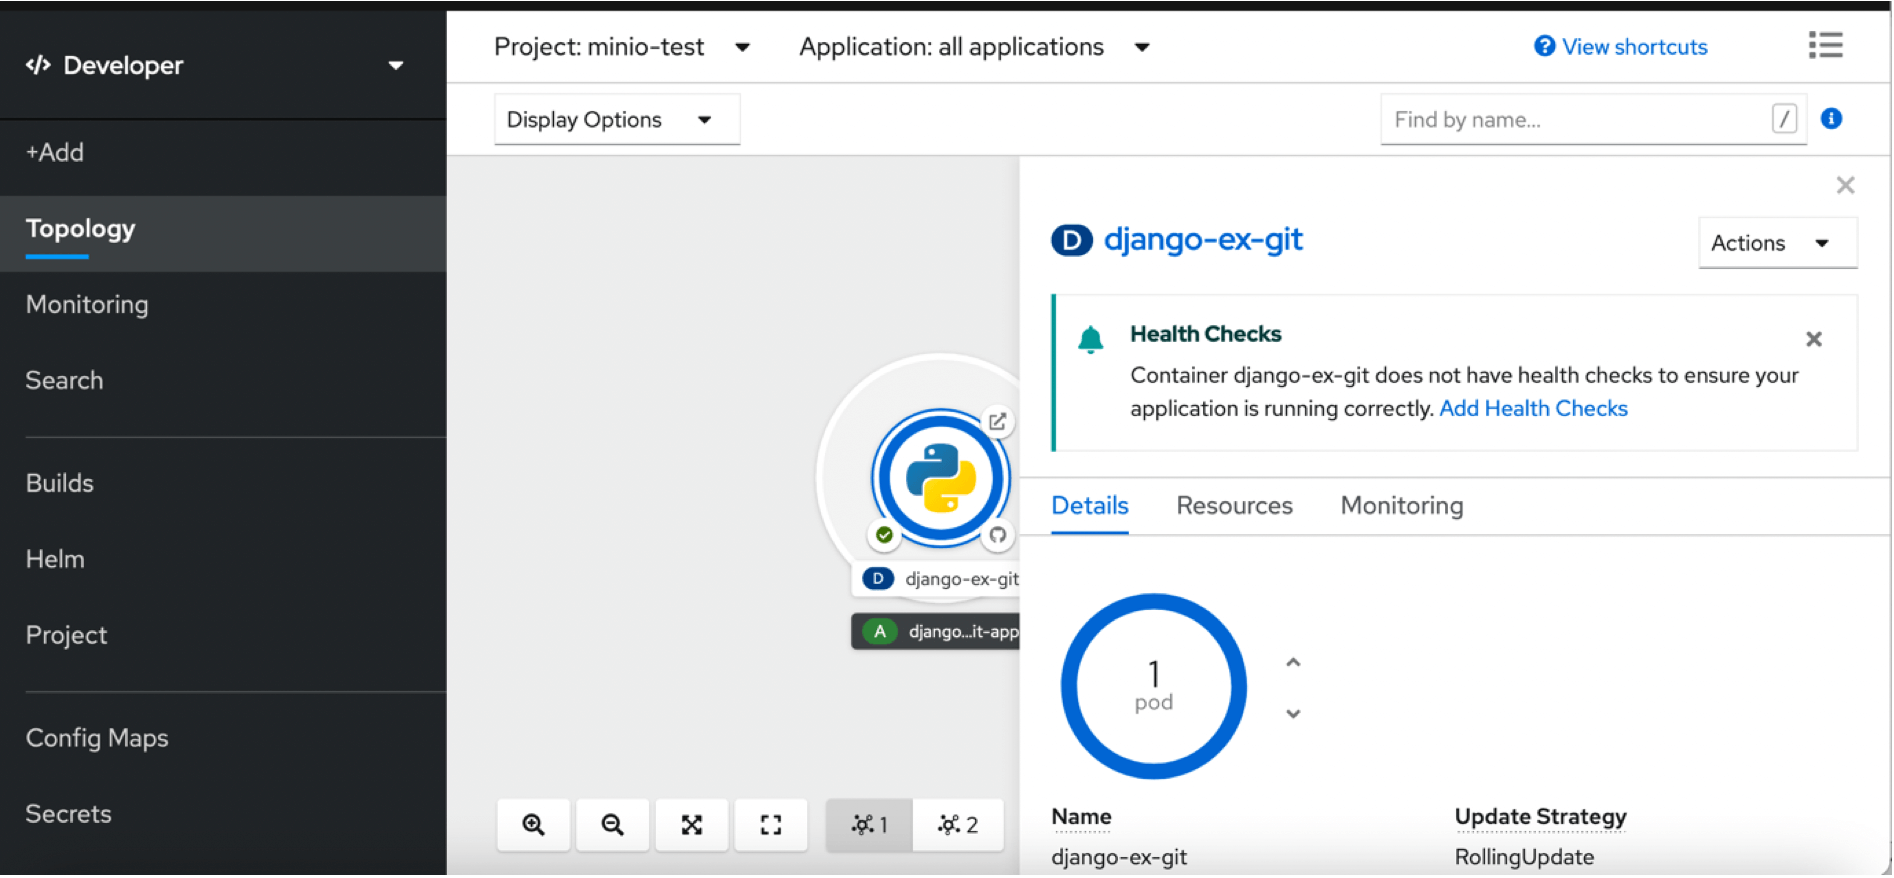 Figure 1: The single Django pod before autoscaling
 - Add Metrics to the Deployment YAML
Go to Administrator -> Deployments and edit the YAML of your deployment and search for the resources parameter. By default, this parameter is empty i.e. resources: {}. You need to remove the braces and add a value for the CPU as shown in Figure2. The 200m here is just an arbitrary starting value. If you don’t do this, the autoscaler will ignore our pods since it will not be able to fetch the CPU metrics from the running pods.
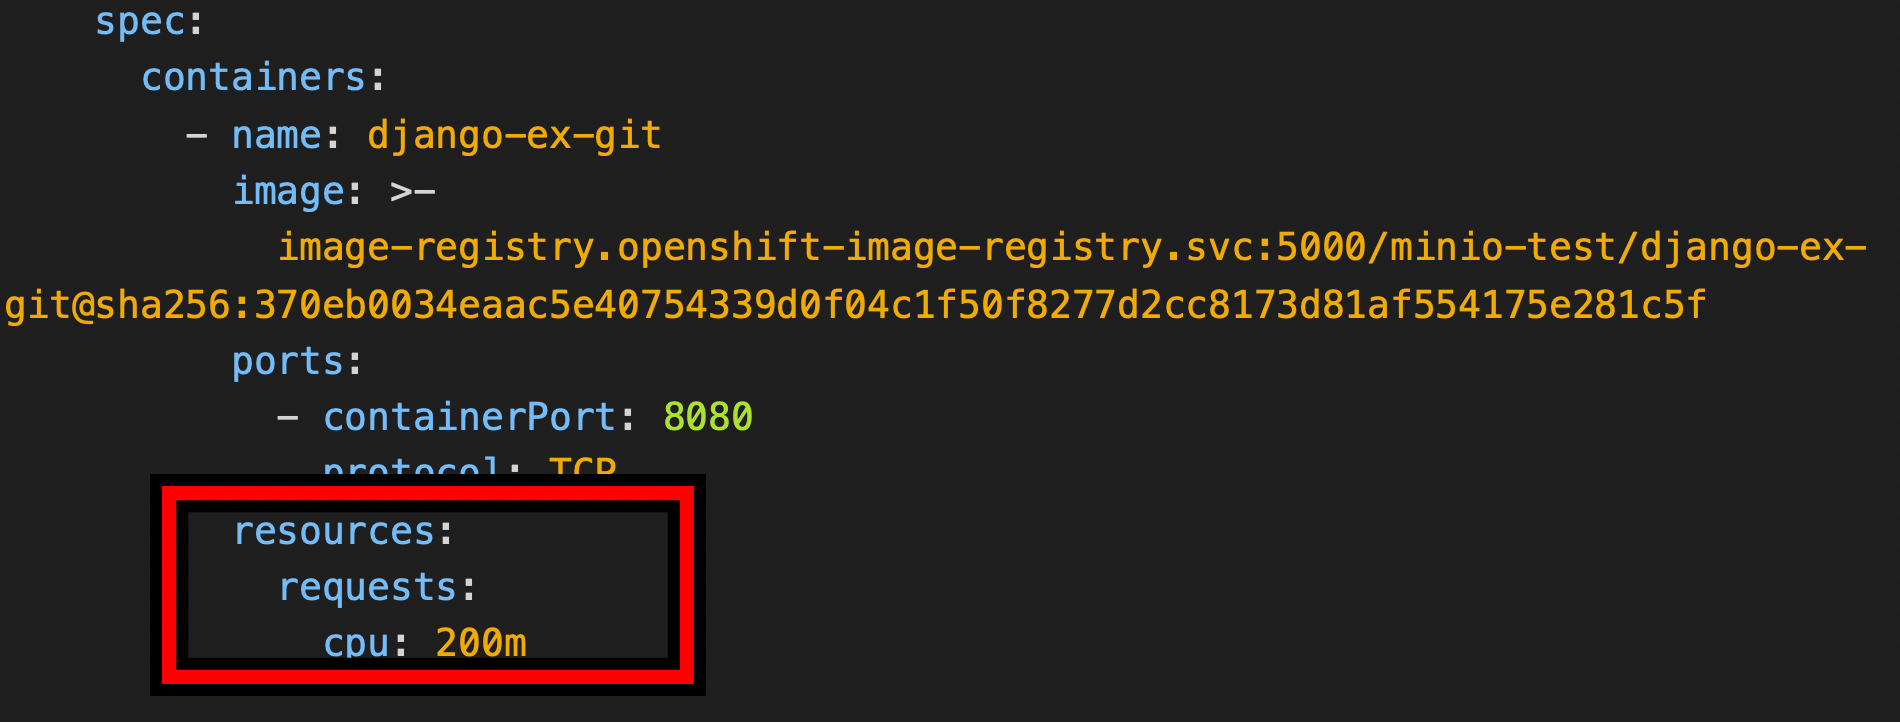 Figure 2: Adding the cpu: 200m reservation within the Build object
 - Create the Horizontal Pod Autoscaler
Go to Administrator -> Workloads -> Horizontal Pod Autoscalers and select Create Horizontal Pod Autoscaler and edit the resulting YAML. In the spec block, replace name with that of your deployment i.e. django-ex-git. For the purposes of our test, you can reduce targetAverageUtilization from 50 to 2 so the autoscaler will scale the pods up to a maximum of 3 replicas as soon as the pod CPU load exceeds just 2% rather than 50%.
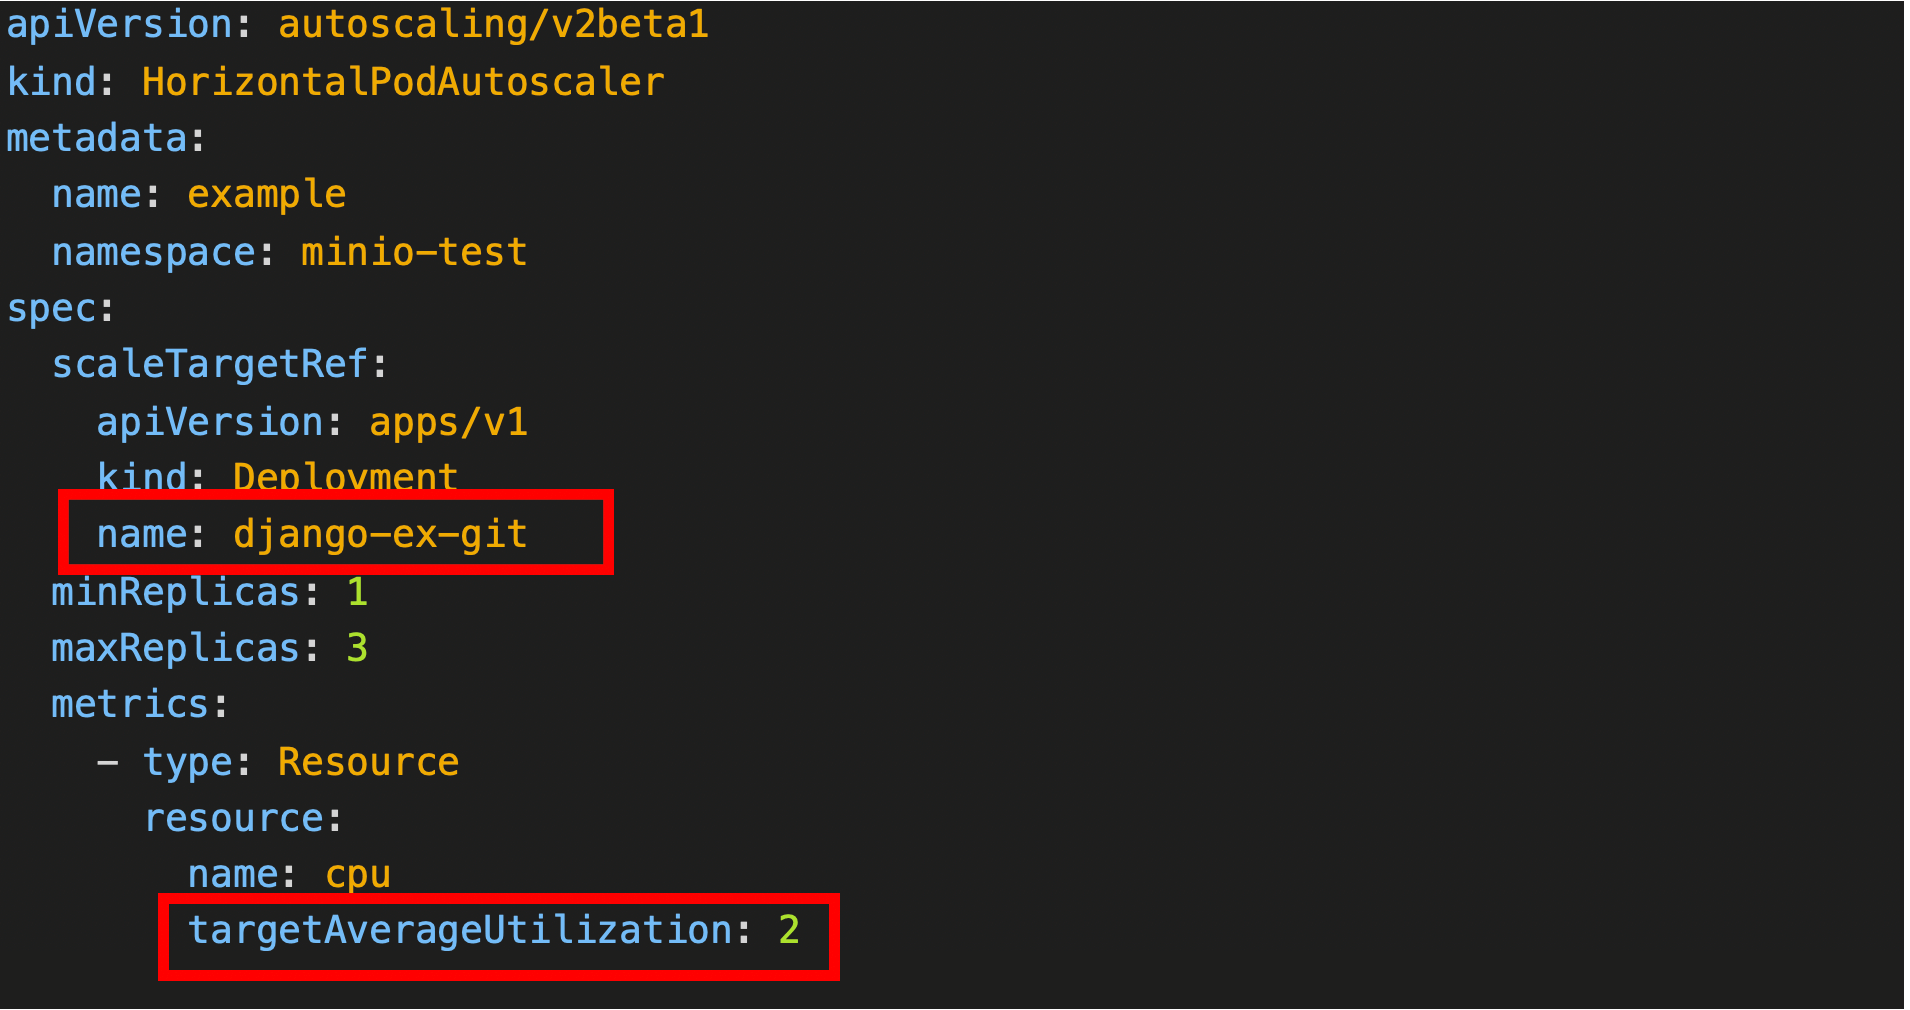 Figure 3: Editing the HorizontalPodAutoscaler object
Once you have saved your HPA, you should end up with an active autoscaler object.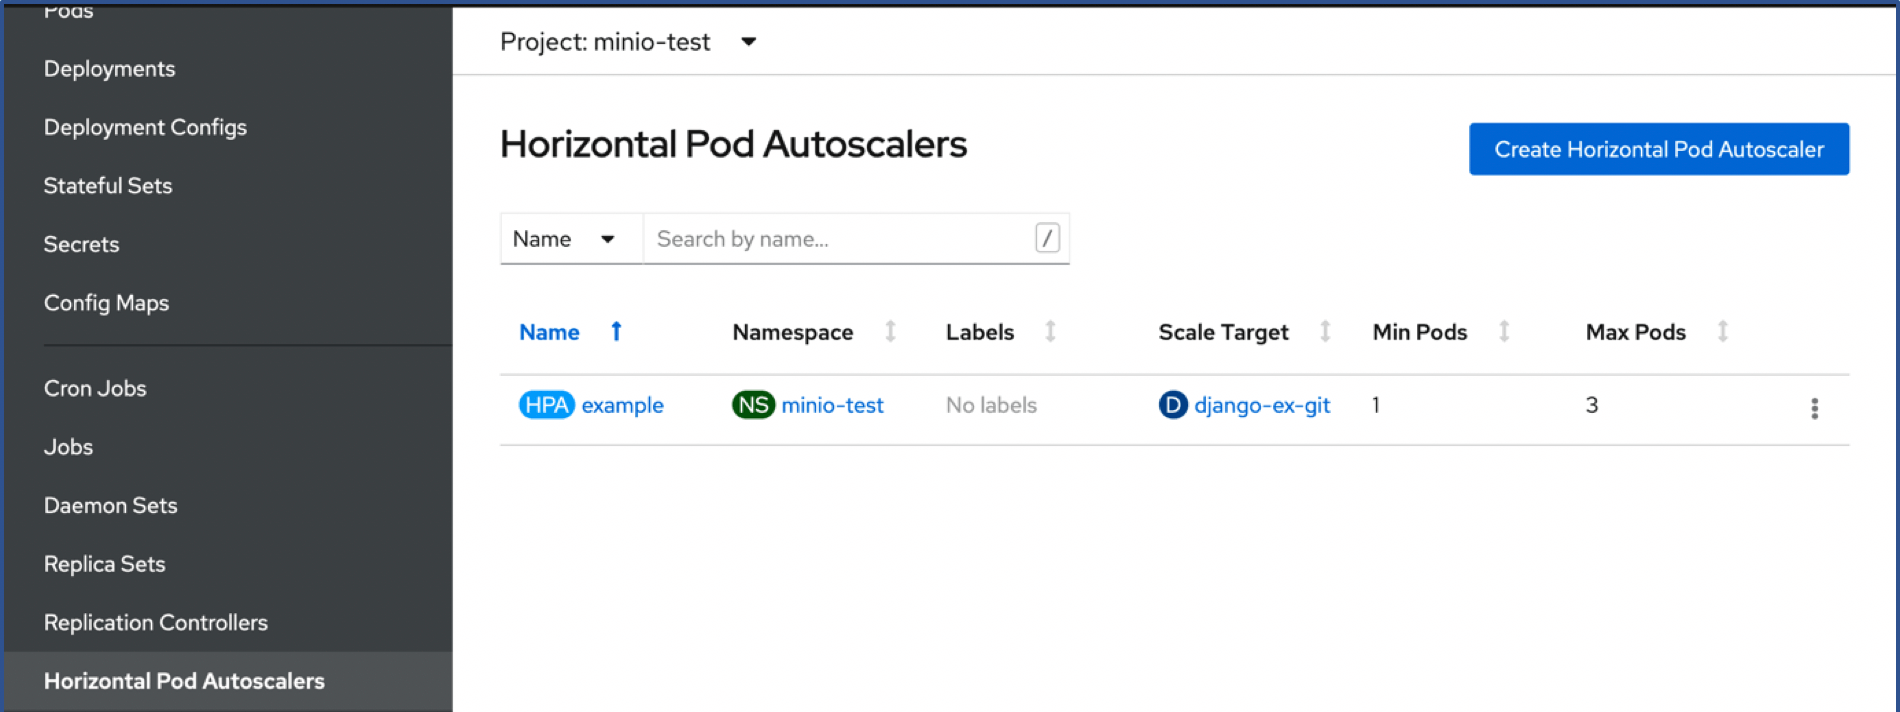 Figure 4: The just created HorizontalPodAutoscaler object
Checking the Conditions of the autoscaler object you should see these two conditions in Figure 5 below, both with a status of True. If you forgot to define the resources in Figure 2., you will see a message under Reason saying that the metrics values could not be read instead of the ValidMetric Found message. Figure 5: Part of the HorizontalPodAutoscaler object display
 - Load up the Pod to make it Autoscale
Now it’s time to put some load on our Django pod so HPA has a chance to autoscale. To do this, you can run a simple request loop from your laptop or desktop PC.
$ for((i=0;i<500;i++)) do curl --connect-timeout 3 'http://django-ex-git-<your project>.apps.<your domain>'; done;
Now the magic will happen. After a short wait, the pods will scale from 1 to 3 and then back again to 1 once the load has been removed i.e. some time after the 500 script requests have completed.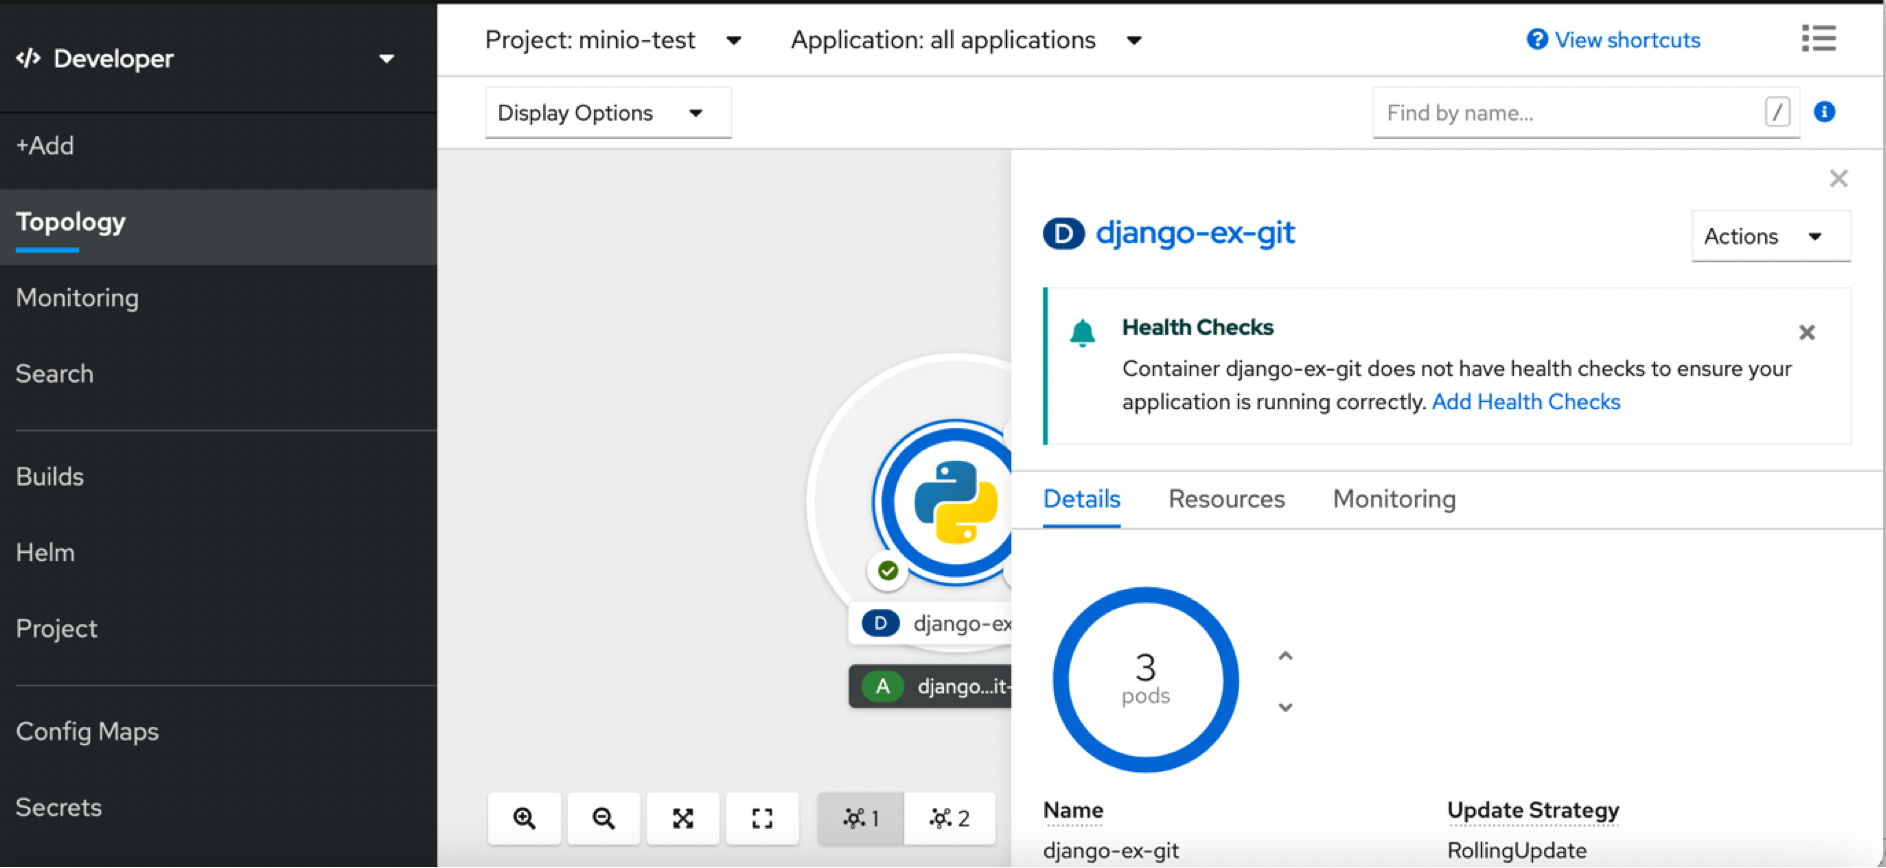 Figure 6: The Django application has now been scaled to 3 pods by the autoscaler
Looking at the in-built monitoring metrics for the pods, you can see that the green area below represents the initial pod and the two shades of blue, the two new pods that were spun up and stopped again. In order to reduce “thrashing”, there is a default 5 minute cool-down period imposed by Kubernetes when down-scaling (see https://kubernetes.io/docs/tasks/run-application/horizontal-pod-autoscale/).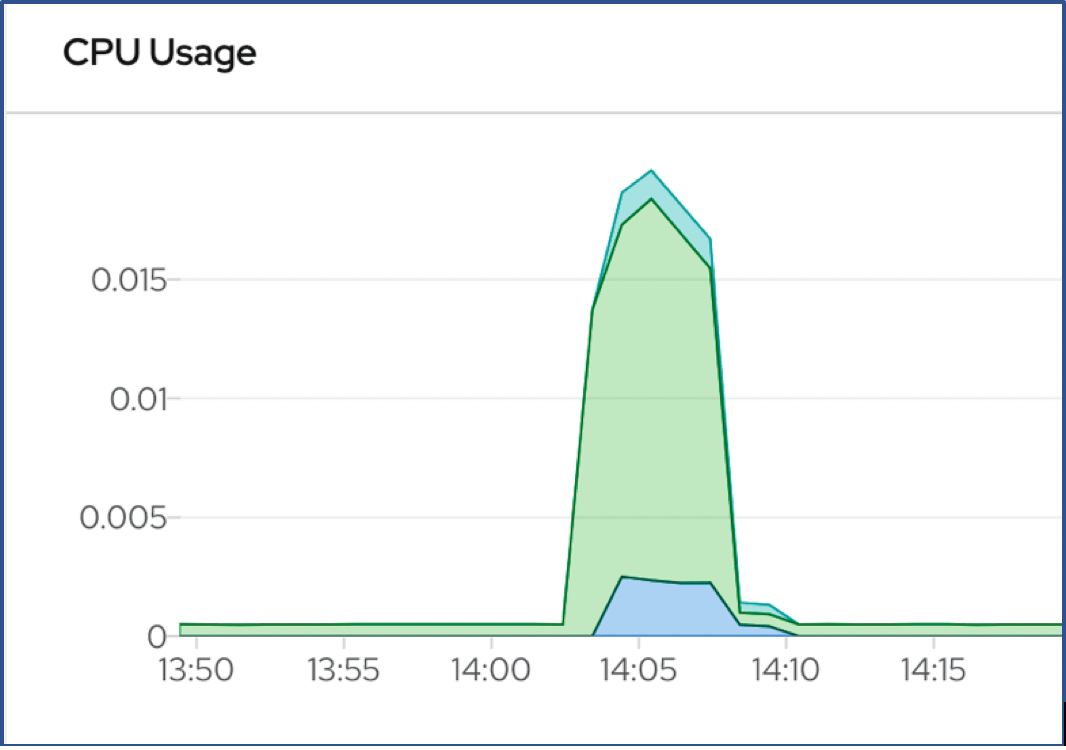
Figure 7: In-built pod metrics showing the spin up / down of the extra two pods
Summary
After you create a horizontal pod autoscaler, OpenShift begins to query the CPU and/or memory resource metrics on the pods. When these metrics are available, the horizontal pod autoscaler computes the ratio of the current metric utilization with the desired metric utilization, and scales up or down accordingly. The query and scaling occurs at a regular interval, but can take one to two minutes before metrics become available.

Kubernetes at Safe Swiss Cloud
Learn more about the Kubernetes/OpenShift distribution as implemented at Safe Swiss Cloud.
References:
You know what the problem is when activating the METRIC-SERVER in Openshift since it is not installed by default & without that the HPA does not work and the Dashboard graphics are not shown.
You know how to do it, because the way to do it in KUBERNETES (based on Yamls) in OPENSHIFT4 doesn’t work.
Hi Cesar
Many thanks for leaving a comment. Actually I did not have to install anything extra (my version = OKD 4.5). Although, this may be due to the fact that I only autoscale on the cpu resource in this example. I saw from this link https://docs.openshift.com/container-platform/4.5/monitoring/exposing-custom-application-metrics-for-autoscaling.html that there is an option to define custom autoscaling metrics. Is this the YAML that you are referring to?
Kind regards
David