Get going with JupyterLab on OpenShift
JupyterLab is the most widely used data science / machine learning IDE. Deploying it on OpenShift / Kubernetes adds another layer of flexibility in terms of convenience, resource allocation and horizontal scaling across user groups.

Introduction
In this blog post I will outline how to get your data science / machine learning applications running on an OpenShift hosted instance of JupyterLab.
JupyterLab allows you to create and share documents that contain live code, equations, visualizations and narrative text. Uses include: data cleaning and transformation, numerical simulation, statistical modeling, data visualization and machine learning.
OpenShift is a family of containerization software from Red Hat built around Docker containers orchestrated and managed by Kubernetes.

Kubernetes at Safe Swiss Cloud
Learn more about the Kubernetes/OpenShift distribution as implemented at Safe Swiss Cloud
Installing JupyterLab on OpenShift
For installation, I referred to the Red Hat training guides and blog posts in the “References and Further Reading” section below. Based on this information, I was able to quickly build and deploy a JupyterLab container called “custom-notebook” on Safe Swiss Cloud’s OpenShift environment. Once deployed, you will end up with a single user instance of JupyterLab with password authentication. I added a secured route so that the container and thus, JupyterLab, could be accessed externally from the browser with a convenient URL. As an alternative to JupyterLab, you can opt to deploy the multi user version called JupyterHub. The choice is yours. I went for the single user option on the basis that each user can be assigned a different OpenShift project (namespace), thus providing in-built user sandboxing.

Installing TensorFlow on JupyterLab
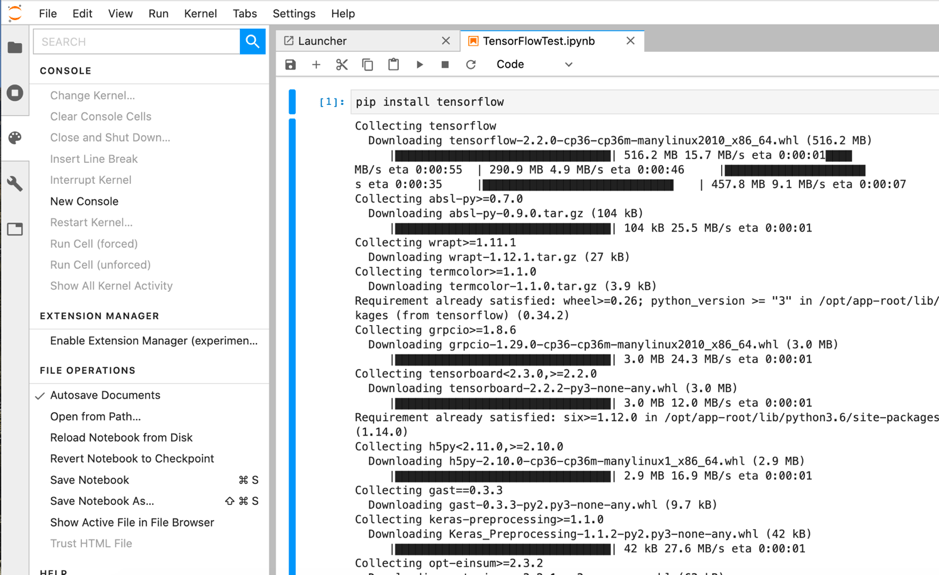
Since Google’s TensorFlow is one of the most widely used machine learning toolkits, I decided to start with that. Installation in JupyterLab could not be easier: Simply create a new notebook with a Python 3 kernel and enter “pip install tensorflow”. After a few minutes, the latest version 2.2.0 will be installed together with Keras, the high level API built on top of TensorFlow.

Installing alternative Machine Learning Toolkits
As well as TensorFlow, I could successfully “pip install” the following toolkits and packages: Facebook Prophet and PyTorch, Microsoft CNTK, Apache MXNet, Intel OpenCV and AWS Sagemaker.
Visualisation tools
The visualisation and tools packages sklearn, matplotlib, plotly and folium were also installed as part of various projects.
OpenShift container sizing considerations
In container (pod) terms, most machine learning toolkits are RAM hungry, so you will need to tune your container resource parameters beyond the default, for example the CNTK needs several GB RAM to even get past the install phase. You can do this by editing the pod YAML file and setting the “memory” resource to e.g. “6Gi”. CPU usage becomes relevant as soon as you start e.g. training a model, not for installations. Whenever you increase resources, the existing pod will be destroyed and a new pod deployed so please make sure that you have mounted the application directory to persistent storage otherwise your work will be lost (see next section).
Adding Persistent Storage
Since pods are ephemeral, your data will disappear whenever a pod is rebuilt. To avoid this, you need to mount your application directory onto persistent storage. For example, you can create a persistent volume claim (pvc) via the OpenShift GUI and modify your pod YAML to associate your application directory with your pvc.
Any Questions?
If you have questions or suggestions, please leave a comment.


Is openshift compatible with gpu resources on cloud?