Tutorial: Adding Persistent Storage to a Container in Kubernetes
In this post, I will show you how to make your application data persist by adding a persistent volume claim to an already deployed pod/container.

Background: Why do we need persistent storage?
For this example, I will use Wiki.js as the target container application. The Wiki.js image is immutable and therefore read only. When the container is created, temporary storage is added to manage all subsequent file changes such as log files and application data. The problem now is that if the container is destroyed e.g. scaled to zero, updated or moved to a different node, all of the written data will disappear. To prevent this happening, we need to store our data in persistent storage.
How to add Persistent Storage
The steps below use the Console and are just one example of how to add persistent storage to a container. Other methods include using the oc command line interface or defining the steps inside a Dockerfile, OpenShift Template, Helm Chart or Kubernetes Operator.
Step 1: Deploy Wiki.js from Image
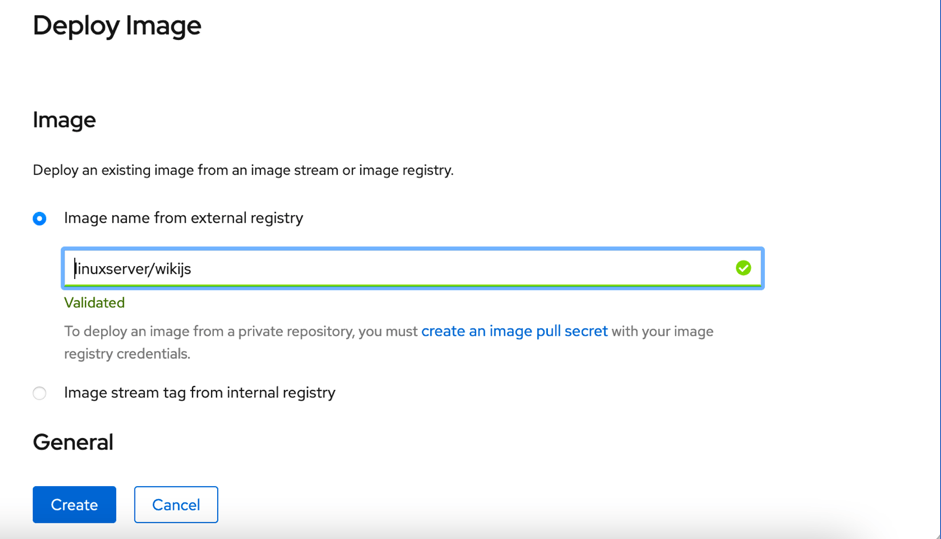
We will deploy the latest Wiki.js image from https://hub.docker.com/r/linuxserver/wikijs inside a project called wikijs. Select the Add to Project -> Container Image option and accept the defaults.
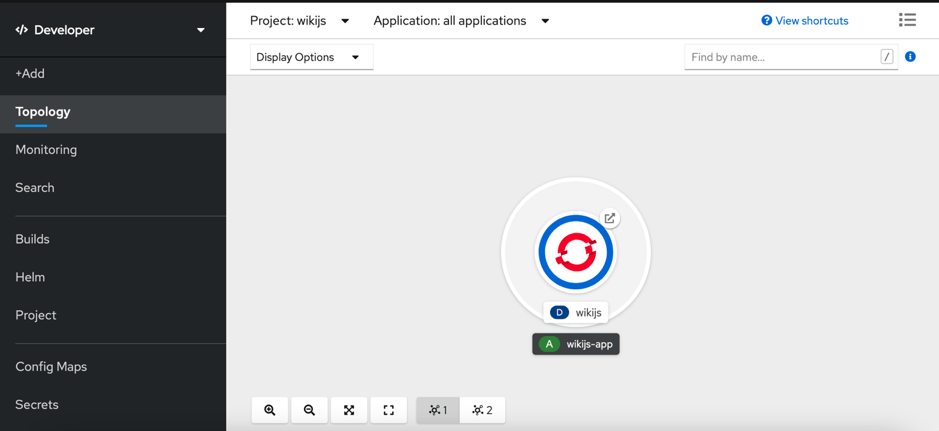
When the container has finished deploying you will already be able to access the wikijs application from your web browser. However, any changes you make will be lost on container stop/start since we haven’t added our persistent volumes yet. So, let’s get our persistent storage connected up.
Step 2: What directories need to be persisted?
We need to figure out which directories need to be mounted onto persistent storage. Looking at the documentation https://hub.docker.com/r/linuxserver/wikijs we can see that we need to mount:
- /config and
- /data

Kubernetes at Safe Swiss Cloud
Learn more about the Kubernetes/OpenShift distribution as implemented at Safe Swiss Cloud.
Step 3: Create the Persistent Storage Claims (PVC)
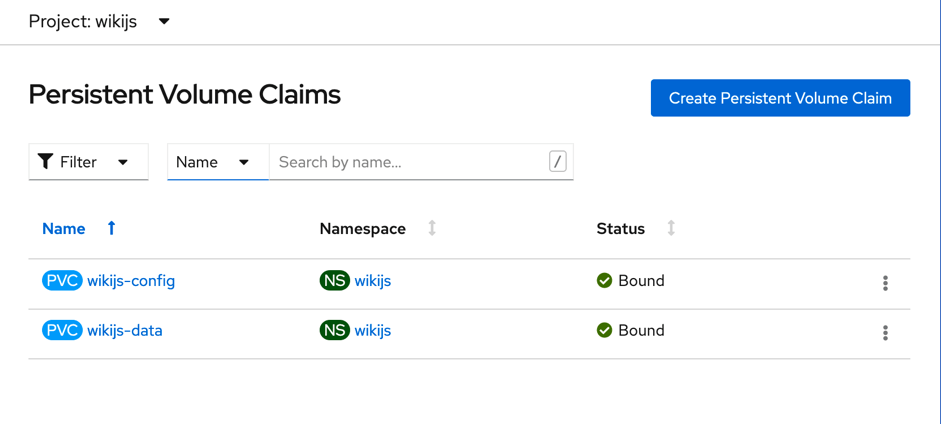
Create two Persistent Volume Claims with the sizes you require. You must select either Single User (RWO) or Shared Access (RWX). You should select RWO if you only want one container to write to the storage i.e. you plan to have just one wikijs replica (instance) running, otherwise choose RWX. See https://docs.openshift.com/container-platform/4.5/storage/understanding-persistent-storage.html for more information. Since our image has a built-in database, we will only run one replica, otherwise we would end up with content inconsistencies.
Step 4: Mount the PVCs on /data and /config
This is a two step process since we have two PVCs to mount.
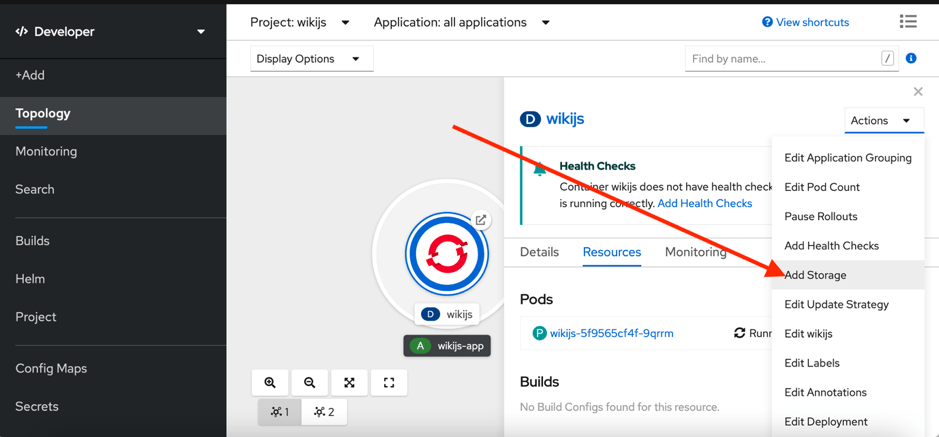
Select Add Storage from the Actions pull down and mount the two PVCs onto the /data and /config mount points.
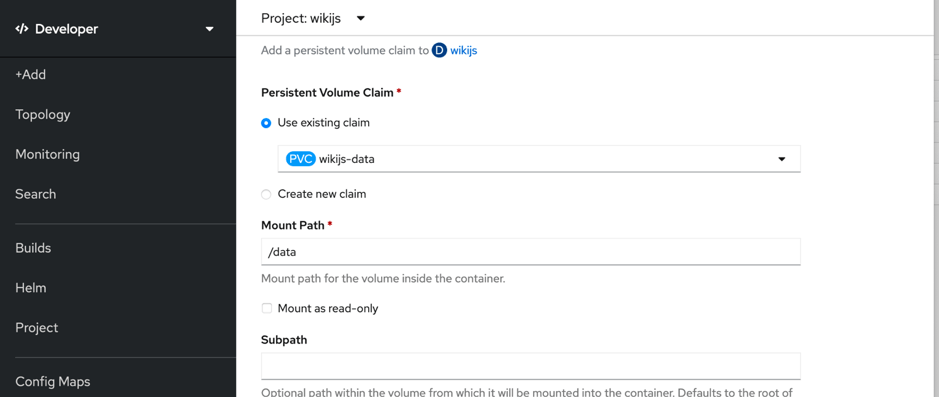
When hitting the Save button, the change will be detected and applied.
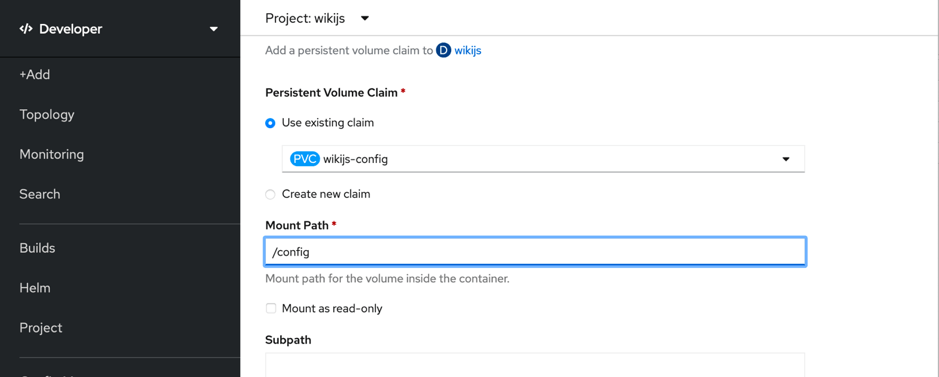
Again, after hitting the Save button, the change will be detected and applied. The persistent storage has now been fully connected to the pod. Next we can confirm that it really worked as expected.
Step 5: Check that it Worked
Navigating to Deployment Details -> Volumes, the two PVCs and their mount paths should be displayed.

As an added check, we can log into the pod terminal at the OS level and enter df -kh to confirm that /config and /data have been mounted onto persistent storage as shown below. Here the IP 10.0.0.99 is that of the NFS used in our OpenShift cluster.

Step 6: Ready to go!
We can now start configuring and using Wiki.js, knowing that our data is safe and sound.

Kubernetes at Safe Swiss Cloud
Learn more about the Kubernetes/OpenShift distribution as implemented at Safe Swiss Cloud.


Please Note:
You may use one of these HTML tags and attributes: <a href="" title=""> <abbr title=""> <acronym title=""> <b> <blockquote cite=""> <cite> <code> <del datetime=""> <em> <i> <q cite=""> <s> <strike> <strong>